SwiftUI & SwiftData: Select a Table Row and Show Details
Intro
I was building a little macOS prototype app for (yet another) bookmarks manager recently. I thought implementing a common UX would be straightforward:
- See a table of data
- Select a row
- See details in an inspector panel
There are some modern clean SwiftUI components that should make this easy. Table (not to be confused with the older UITableView) shows a table and allows for selecting a row. There’s an inspector() modifier for a clean looking inspector panel.
And I wanted the data in the app to be powered by SwiftData, which is similarly simple and awesome. Apple says it’s “designed to integrate seamlessly with SwiftUI”, but as we’ll see in a sec, it’s not always so straightforward.
If you’re not familiar with SwiftData, the esteemed Paul Hudson has a fantastic crash course.
So, SwiftUI Table + Inspector + SwiftData. Let’s go.
Building the Table
If our SwiftData model is this:
import Foundation
import SwiftData

@Model
final class Bookmark: Identifiable {
    var label: String
    var URL: URL

    init(label: String, URL: URL) {
        self.label = label
        self.URL = URL
    }
}
We can list the bookmarks in a table with a simple view like this:
import SwiftUI
import SwiftData

struct ContentView: View {
    @Environment(\.modelContext) var modelContext
    @Query var bookmarks: [Bookmark]

    var body: some View {
        Table(bookmarks) {
            TableColumn("Label", value: \.label)
            TableColumn("URL", value: \.URL.absoluteString)
        }
    }
}

#Preview {
    ContentView()
}
Remember for SwiftData, you also have to add a modelContainer() modifier on your main view, so if you’re following along be sure to have something like this:
import SwiftUI
import SwiftData

@main
struct BookmarksApp: App {
    var body: some Scene {
        WindowGroup {
            ContentView()
                .modelContainer(for: Bookmark.self)
        }
    }
}
Let’s add a button to populate some sample data. Here’s a simple function we’ll put in our view:
func addSampleData() {
    let samples = [
        Bookmark(
            label: "This guy looks pretty cool",
            URL: URL(string: "https://levinelson.com")!
        ),
        Bookmark(
            label: "This app is super cool",
            URL: URL(string: "https://deferapp.com")!
        ),
        Bookmark(
            label: "This one's not too bad either",
            URL: URL(string: "https://yesterdays.app")!
        )
    ]

    for bookmark in samples {
        modelContext.insert(bookmark)
    }
}
We can add the button to the toolbar with this modifier on the Table:
.toolbar {
    Button("Add Samples", systemImage: "plus", action: addSampleData)
}
Cool! So far so good.
Adding the Inspector
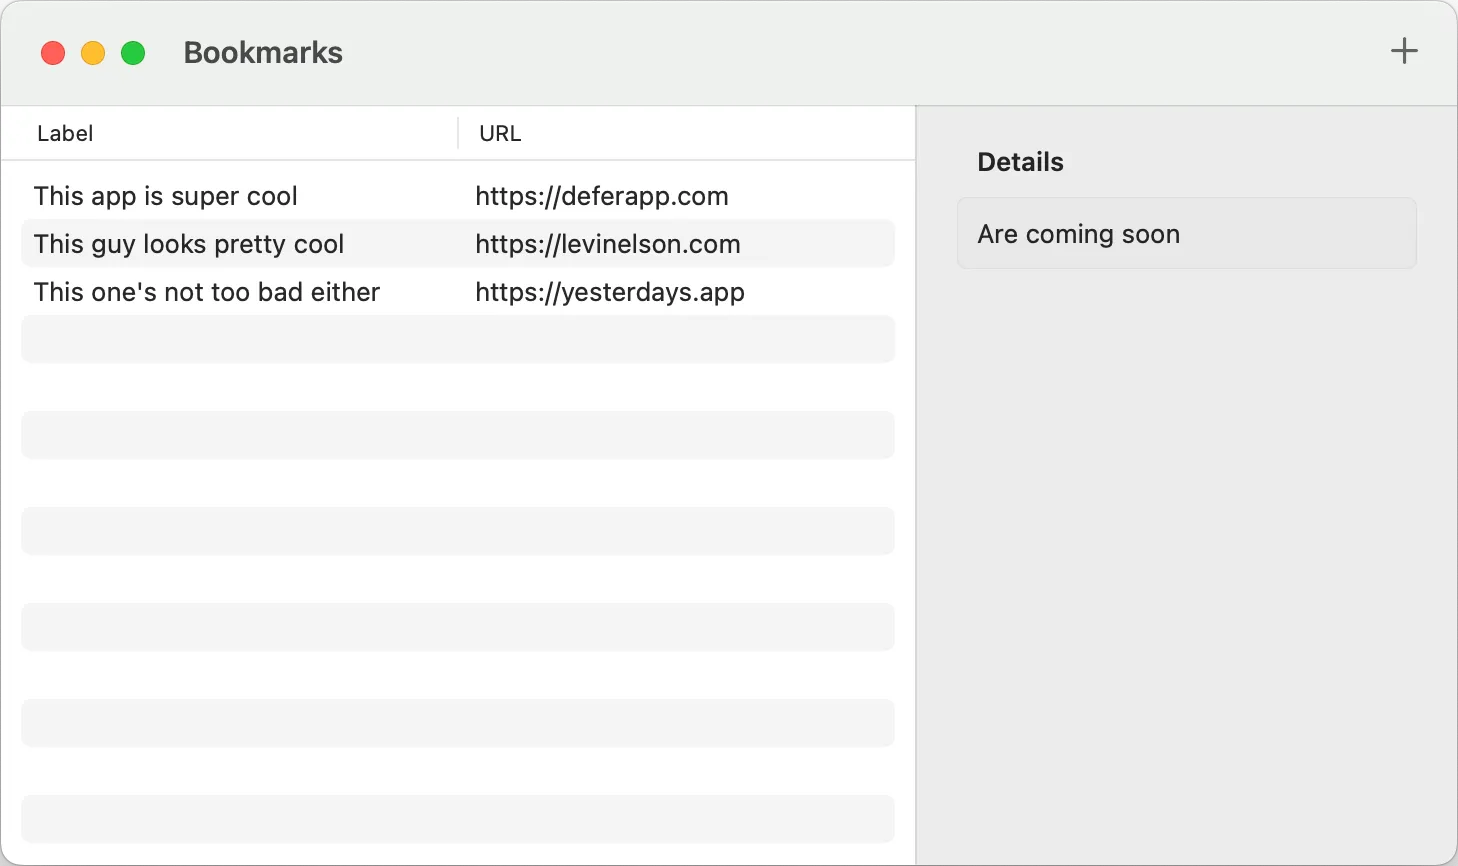
Now let’s get that inspector showing, with this modifier on the Table as well…
.inspector(isPresented: .constant(true)) {
    Form {
        Section("Details") {
            Text("Are coming soon")
        }
    }
}
We’ll replace that .constant(true) binding in a minute, but at least now we can see the inspector showing up correctly.
Here’s what we’ve got so far:

Selection on a Table
I assumed I could just bind to a Bookmark itself for the selection, but Apple says that
Binding to a single instance of the table data’s
idtype creates a single-selection table.
So we need to bind to an ID. Looks like we can do something like this, because SwiftData objects come with an identifier fo’ free.
struct ContentView: View {

    // existing code

    @State private var selection: Bookmark.ID? = nil

    var body: some View {

        Table(bookmarks, selection: $selection) { // <- binding
            TableColumn("Label", value: \.label)
            TableColumn("URL", value: \.URL.absoluteString)
        }

        // existing code

    }
}
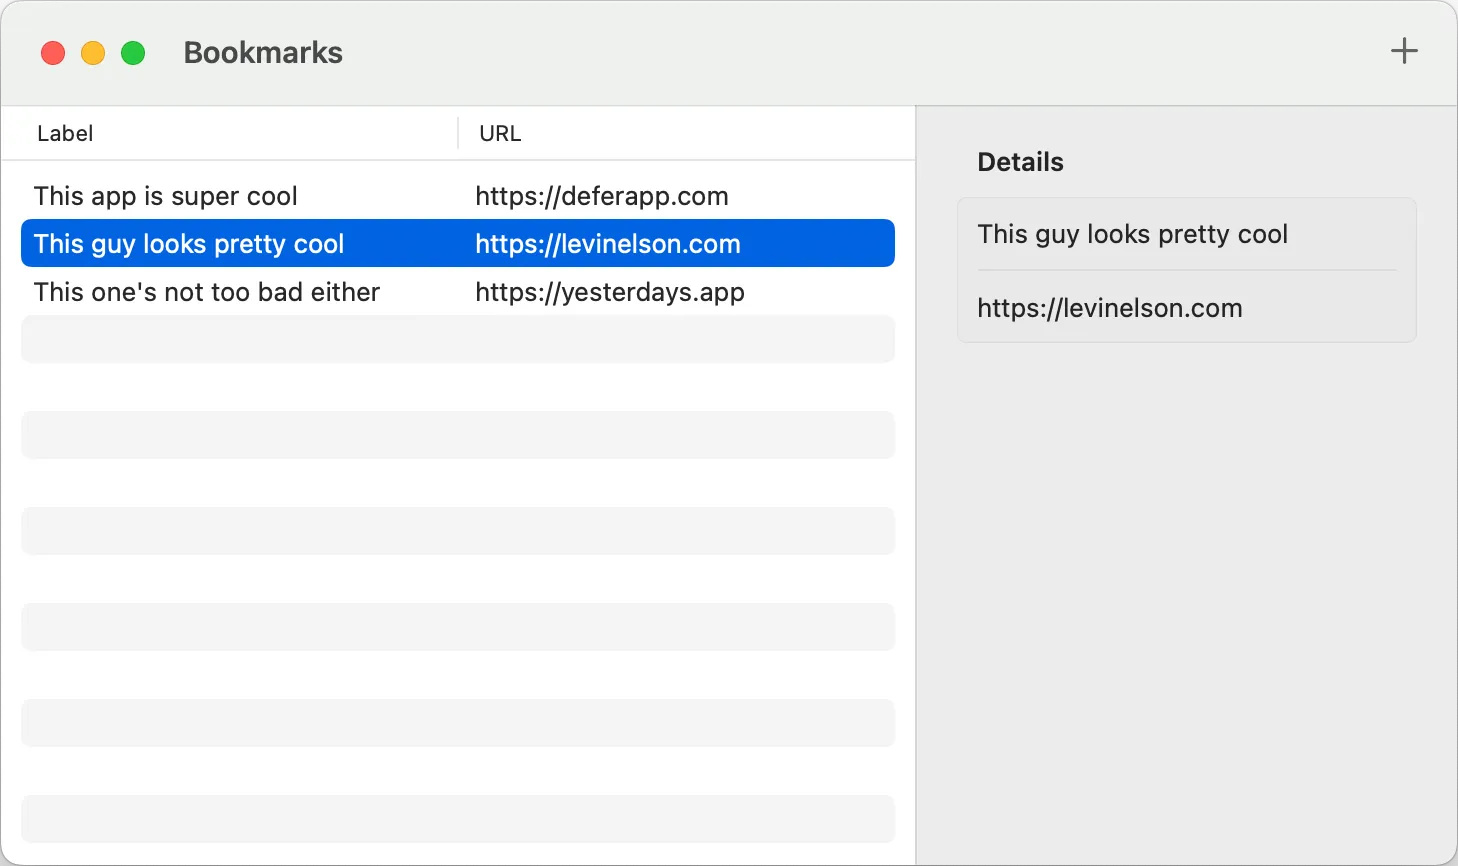
And now a row highlights when we click on it!
But how do we load the details for a bookmark in the inspector panel?
Loading Details in the Inspector
This is where working with SwiftData isn’t as straightforward as I’d like. You’d think you’d use some kind of modelContext.fetch() method with a #Predicate comparing IDs, but nope. Thankfully, our hero Paul helped me figure out how to look up a SwiftData object by its identifier. We need our Inspector to look like this:
.inspector(isPresented: .constant(selection != nil)) {
    if  let selection = selection,
        let bookmark = modelContext.registeredModel(
            for: selection
        ) as Bookmark? {
        Form {
            Section("Details") {
                Text(bookmark.label)
                Text(bookmark.URL.absoluteString)
            }
        }
    }
}
After using SwiftData for a year now, I’ve never used that kind of lookup. But there ya have it, learned something new. I assume it has something to do with the ID being a different underlying data type, but that’s above my pay grade.
Now we can click on a row, and the details correctly populate in the Inspector. Woohoo!

Editable Details
If you wanted to make the details editable, you could do something like this with SwiftData’s @Bindable property wrapper and a subview.
.inspector(isPresented: .constant(selection != nil)) {
    if let selection = selection,
    let bookmark = modelContext.registeredModel(
        for: selection
    ) as Bookmark? {
        BookmarkDetailView(bookmark: bookmark) // <- new subview
    }
}
struct BookmarkDetailView: View {
@Environment(\.modelContext) var modelContext
@Bindable var bookmark: Bookmark
var body: some View {
Form {
Section("Details") {
TextField("Label", text: $bookmark.label)
TextField("URL", text: Binding(
get: { bookmark.URL.absoluteString },
set: { bookmark.URL = URL(string: $0) ?? bookmark.URL }
))
Button("Delete", systemImage: "trash") {
modelContext.delete(bookmark)
}
}
}
}
}We did it! Now we can move on to other more exciting things.
Full Code
Here’s all the code for reference:
import SwiftUI
import SwiftData
@Model
final class Bookmark: Identifiable {
var label: String
var URL: URL
init(label: String, URL: URL) {
self.label = label
self.URL = URL
}
}
@main
struct BookmarksApp: App {
var body: some Scene {
WindowGroup {
ContentView()
.modelContainer(for: Bookmark.self)
}
}
}
struct ContentView: View {
@Environment(\.modelContext) var modelContext
@Query var bookmarks: [Bookmark]
@State private var selection: Bookmark.ID? = nil
var body: some View {
Table(bookmarks, selection: $selection) {
TableColumn("Label", value: \.label)
TableColumn("URL", value: \.URL.absoluteString)
}
.toolbar {
Button("Add Samples", systemImage: "plus", action: addSampleData)
}
.inspector(isPresented: .constant(selection != nil)) {
if let selection = selection,
let bookmark = modelContext.registeredModel(
for: selection
) as Bookmark? {
BookmarkDetailView(bookmark: bookmark)
}
}
}
func addSampleData() {
let samples = [
Bookmark(
label: "This guy looks pretty cool",
URL: URL(string: "https://levinelson.com")!
),
Bookmark(
label: "This app is super cool",
URL: URL(string: "https://deferapp.com")!
),
Bookmark(
label: "This one's not too bad either",
URL: URL(string: "https://yesterdays.app")!
)
]
for bookmark in samples {
modelContext.insert(bookmark)
}
}
}
struct BookmarkDetailView: View {
    @Environment(\.modelContext) var modelContext
    @Bindable var bookmark: Bookmark

    var body: some View {
        Form {
            Section("Details") {
                TextField("Label", text: $bookmark.label)
                TextField("URL", text: Binding(
                    get: { bookmark.URL.absoluteString },
                    set: { bookmark.URL = URL(string: $0) ?? bookmark.URL }
                ))
                Button("Delete", systemImage: "trash") {
                    modelContext.delete(bookmark)
                }
            }
        }
    }
}
#Preview {
ContentView()
}